Let’s look first at how an instructor might use PowerPointÔ to teach her students. Drawing again on our friend President Andrew Jackson, we can do the following:
Following the instructions presented to you earlier in this unit, our sequence might look like the following group of slides. Remember the important suggestions of selecting your background and choosing an appropriate degree of brightness. The more you practice, the easier it will become. Notice that the background and title information for this group of slides are identical from frame to frame. This is one of the great assets of this presentation software. Once you have made a standard template or slide background, you can add, delete, and rearrange information to suit your needs.
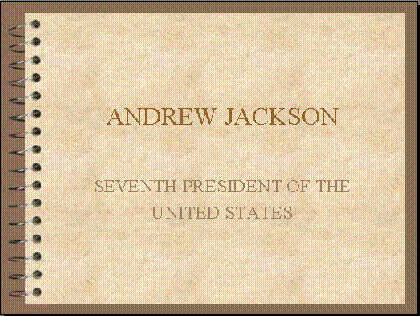
Here then is the title slide in the presentation. This one is simple and straightforward, but you can add your name, a date, the class topic, or any other informative or required information. This is the best time to experiment with background templates, colors, and shades. You can always change the background design later, but "getting it right the first time" is to your advantage. Remember using the Internet (see Using the Internet and World Wide Web for Teaching) for teaching? Don’t toss out those website images you captured! Just start with a blank template as Larry demonstrated add your title information, and add the website images that you saved. They drop very nicely into slides as you see in the next two examples.